Getting started
1. Machine-specific config
You can find an automatically generated machine_specific_paths.toml file in the repository. This configuration file should contain the following entries (optionally, you can adjust these paths as needed):
# Absolute path to the directory in which all datasets are stored (str)
datasets_folder_path = '../datasets'

# Directory for saving toolbox output as an absolute path (str)
output_folder_path = '../outputs'

# Where to find your conda (miniconda or anaconda) installation as absolute path (str)
conda_path = 'path/to/your/conda'
2. Example dataset
We provide an example dataset called communication_multiview to demonstrate the NICE Toolbox’s capabilities. Please find it in the datasets folder specified above.
3. Check the dataset’s properties
Ensure that ./configs/dataset_properties.toml contains the following dictionary:
[communication_multiview]
session_IDs = ["session_xyz"]
sequence_IDs = ['']
cam_front = 'view_center'
cam_top = 'view_top'
cam_face1 = 'view_left'
cam_face2 = 'view_right'
subjects_descr = ["person_left", "person_right"]
cam_sees_subjects = {view_center = [0, 1], view_top = [0, 1], view_left = [0], view_right = [1]}
path_to_calibrations = "<datasets_folder_path>/communication_multiview/calibrations.npz"
data_input_folder = "<datasets_folder_path>/communication_multiview/<session_ID>/"
start_frame_index = 0
fps = 30
A detailed description of this file can be found in the wiki page on config files under dataset properties.
4. Add an experiment to run
To run the NICE toolbox on the dataset, we need to specify what exactly we want to run in our experiment. Open ./configs/detectors_run_file.toml and ensure that the [run] dictionary includes the following:
[run]
[run.communication_multiview]
components = ["body_joints", "gaze_individual", "gaze_interaction", "kinematics", "proximity", "leaning", "emotion_individual", "head_orientation"]
videos = [
   {session_ID = "session_xyz", sequence_ID='', video_start = 0, video_length = 99},
]
More details can be found in the wiki page on config files under run file.
5. Run the NICE Toolbox
To run the toolbox, open a terminal and execute:
# navigate to the NICE toolbox source code folder
cd /path/to/nicetoolbox/

# LINUX: activate the environment
source ./envs/nicetoolbox/bin/activate

# WINDOWS: activate the environment TODO: update
envs\nicetoolbox\Scripts\activate

# run the toolbox
run_detectors
The outputs will be saved in the folder defined in ./configs/detectors_run_file.toml under io.out_folder (with filled-in placeholders).
To monitor the experiment, check the log file at /path/to/<out_folder>/nicetoolbox.log. The tool is expected to take approximately 6 minutes for this experiment.
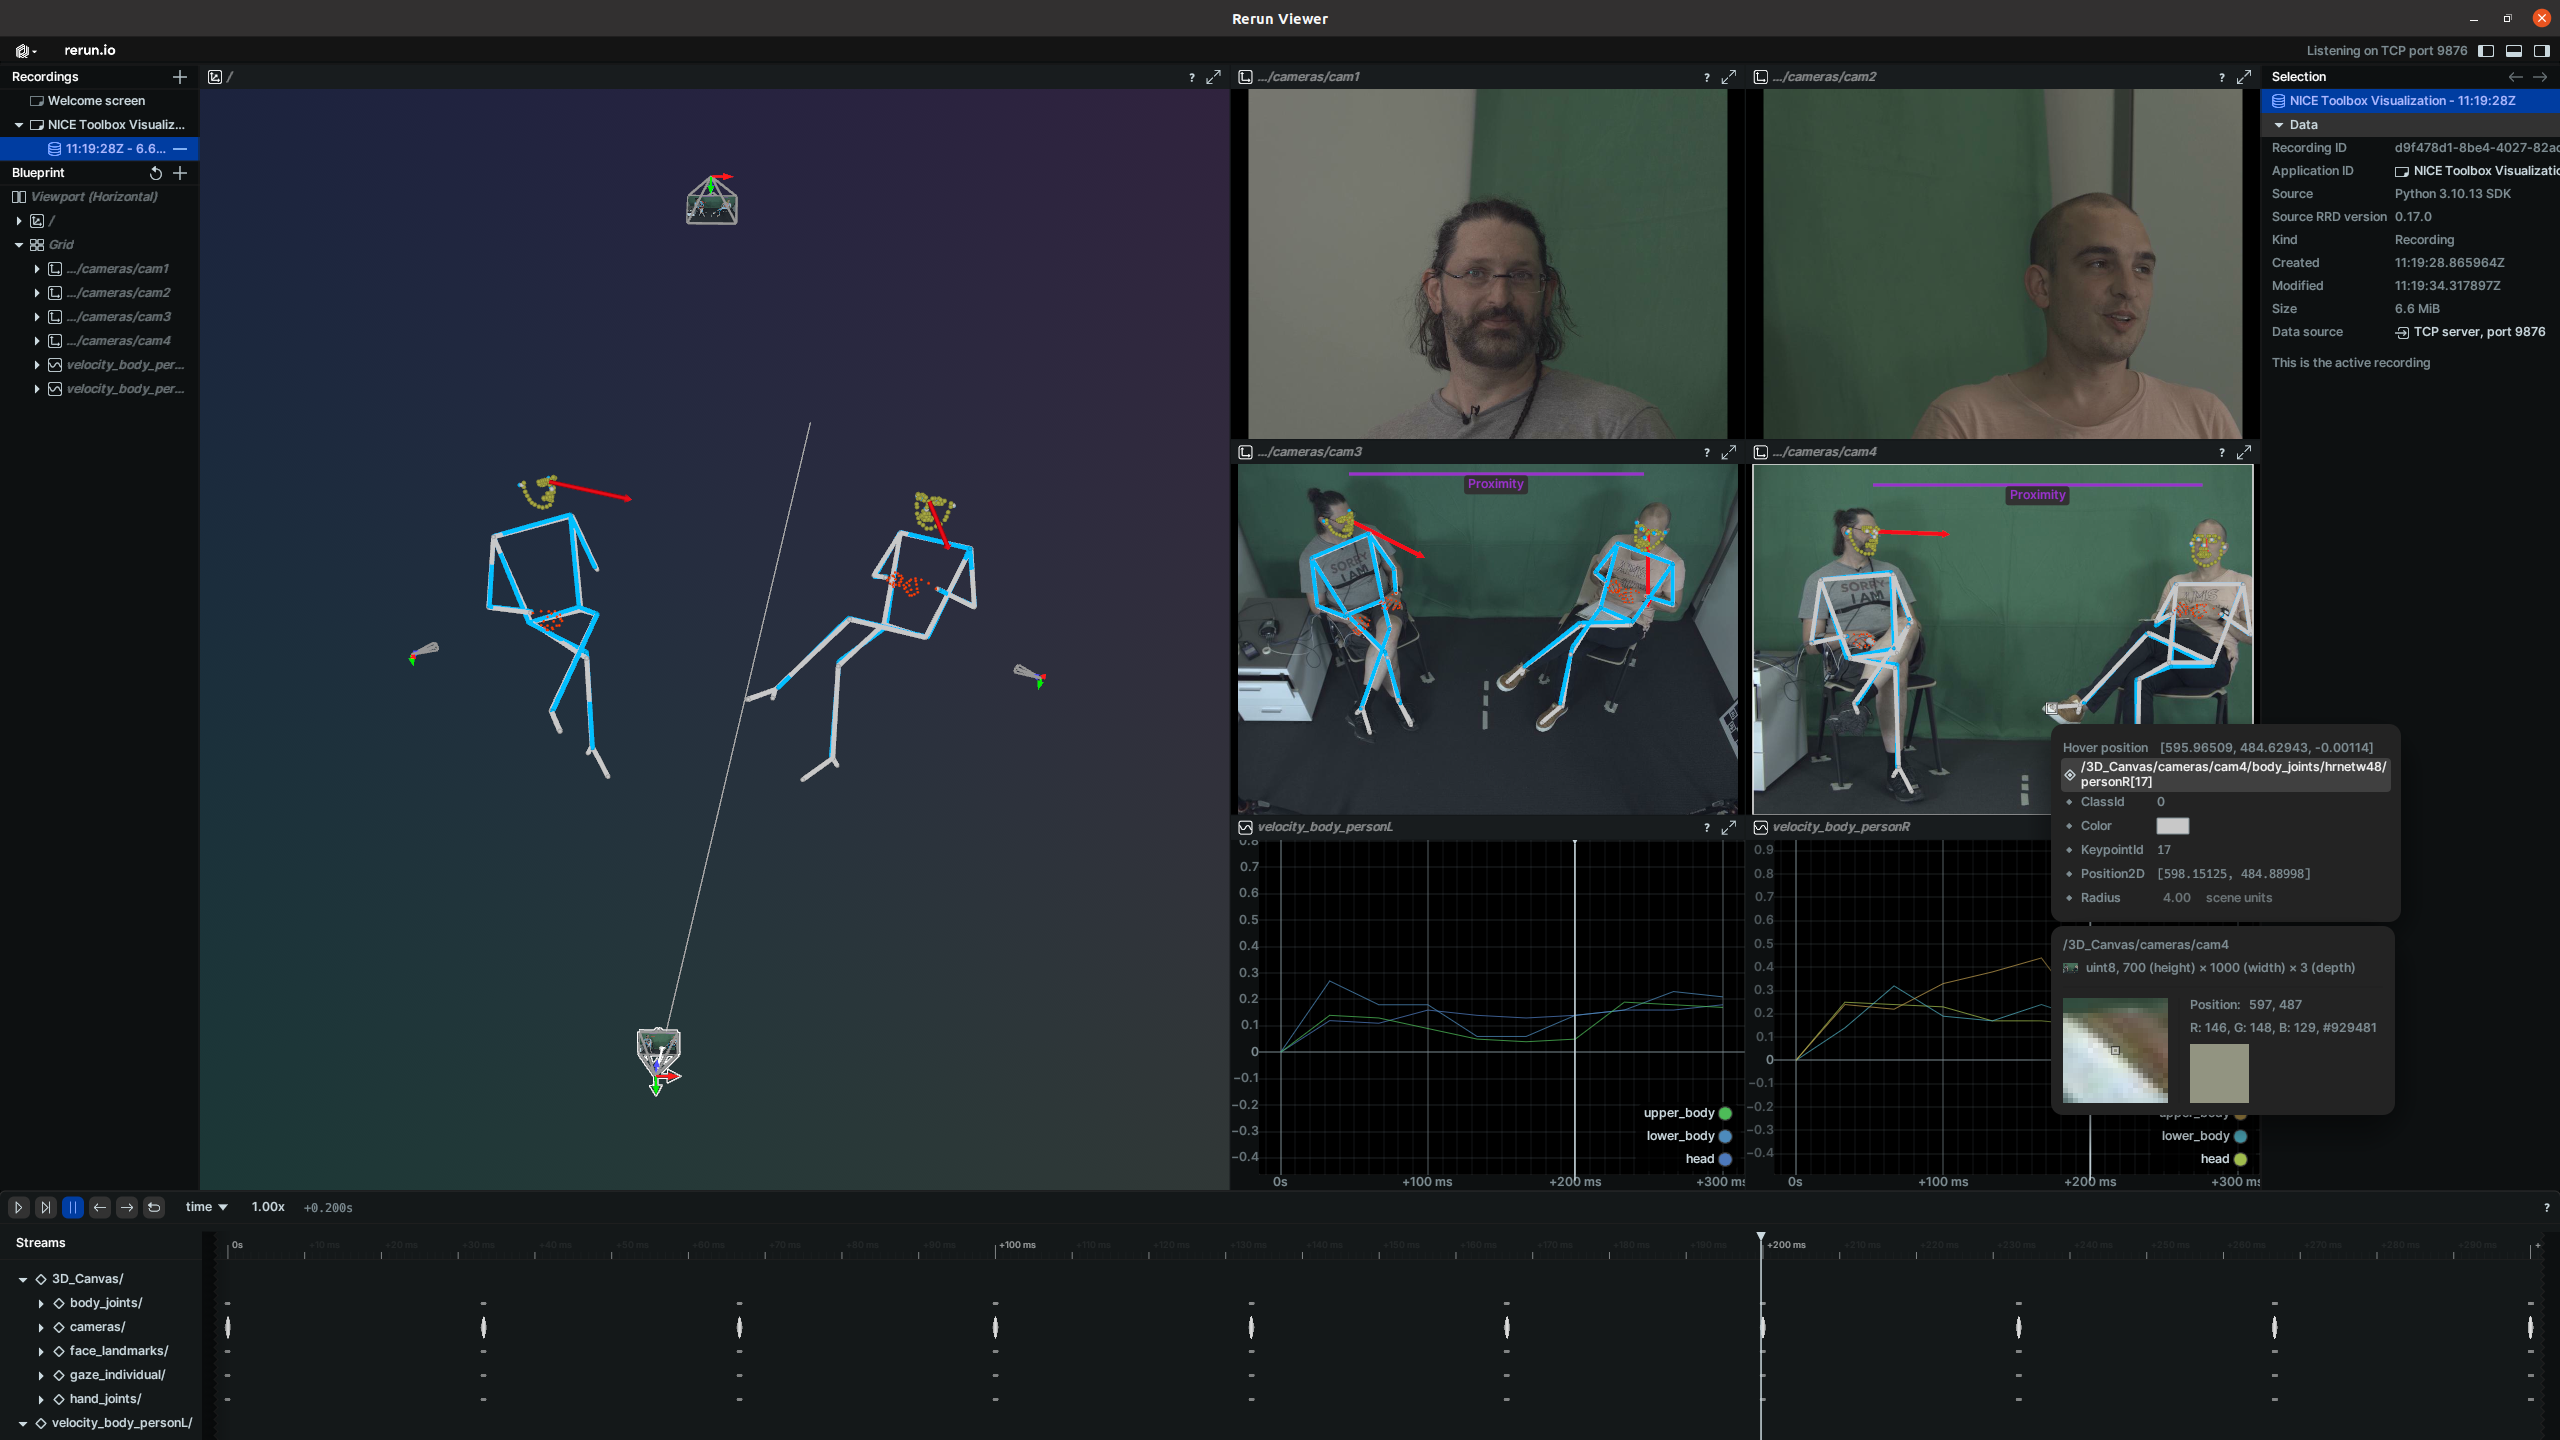
6. Visualize the results
There are multiple options to visualize the results of NICE toolbox.
For an interactive experience, we recommend using our visual code, which runs rerun.
To do so, open ./configs/visualizer_config.toml and update the entries io.experiment_folder, media.dataset_name, and media.video_name.
[io]
dataset_folder = "<datasets_folder_path>"
nice_tool_input_folder = "<output_folder_path>/nicetoolbox_input/<dataset_name>_<session_ID>_<sequence_ID>"
experiment_folder = "<output_folder_path>/experiments/..."                 # NICE Toolbox experiment output folder
experiment_video_folder = "<experiment_folder>/<video_name>"
experiment_video_component = "<experiment_video_folder>/<component_name>"

[media]
dataset_name = 'mpi_inf_3dhp'                                              # name of the video's dataset
video_name = 'mpi_inf_3dhp_S1_s20_l20'                                     # name of video result folder
multi_view = true
A detailed description of visualizer configuration can be found in the wiki page on config files under visualizer config.
Finally, from the top level of your code folder, start the visualizer by running
# activate the python environment if not already activated
source ./envs/nicetoolbox/bin/activate # LINUX
envs\nicetoolbox\Scripts\activate # WINDOWS

# run the visualizer
run_visualization
It will open a window which looks similar to this: